


 MENU
MENUIn this video, we will give a simple demonstration of plotting surface slices, extracting them, and creating an XY line plot from the results.
First, we’ll open our data set. In this demonstration, we are using the Onera wing example found in the Tecplot 360 installation directory. This data set has Pressure Coefficient variable values on the wing surface, and I want to plot a Y-slice of this data in an XY plot.
We can toggle on the contour layer and display the Pressure Coefficient.
Adjusting the Slice
Toggle on Slices in the plot sidebar to place a slice on the plot; Use the slice placement tool to place a slice on the wing surface.
This isn’t in the orientation or slice type that we want, so we will open the Slice Details dialog to adjust it:
- Instead of placing slices in the x-direction, we’ll set them in the y-planes direction. In this case, parallel to the direction of the flow.
- Set slice through to surface zones.
- Then, set the primary slice to Y=0.595.
- Before we extract a slice, we have a few options we will demonstrate:
- If you want to extract multiple slices, you can use start and end slices with intermediate slices (at y=0 and y=1.19, with 1 intermediate slice); But for this example, we will only extract the primary surface slice.
- In Tecplot 360, we extract slices to create new, separate entities in our data set called zones. Once these slices are zones, we can do further analysis, such as plotting, integrations, or exporting the extracted slice.
- Now, click “Extract slices…” and, keep the default options in the dialog:
- We want the default slice group (slice group 1), but we could easily extract another group, or all of them, if we wanted.
- If we had transient data, we could choose if we want a single slice, or the slice extracted through time.
- You can make extractions per slice or per connected region. Connected regions include zone boundaries where the slice goes across multiple zones and when a single zone has distinct regions such as a wing with multiple sections. In our case, both options will give the same result since there is only a single zone and a single region.
- By default, Tecplot 360 will attempt to extract the line as I-ordered data, but extraction as a finite-element line segment format is also possible.
- Next, click extract. In the Zone Style dialog, you should see another zone appear at the bottom of the list. See the Slice zone below for instance.

Mapping Style
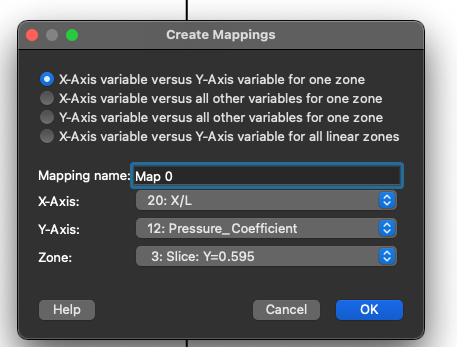
Now create a new Frame, and change to the XY Line plot type, and note the option of creating new mappings for all linear zones. This option is useful if multiple slices are extracted. For the X axis we’ll choose the normalized X variable which I calculated beforehand. For more information on how I calculated this normalize variable, see our Getting Started Guide. For the Y axis we can select the Pressure Coefficient variable. We could name the XY mapping something more useful, but we will take advantage of an intrinsic variable later in the Mapping Style dialog.
After the XY line mappings have been created, I want to edit one of my axes. I want to reverse the Y-variable direction because a y-axis ranging from positive to negative values is typical for a Cp line plot. To reverse the Y axis direction, double click the axis in the plot, or select Plot>Axis, and toggle on Reverse axis direction in the Range tab of the Y1 axis.
Now, tile the frames so that they do not overlap (Frames>Tile Frames…)
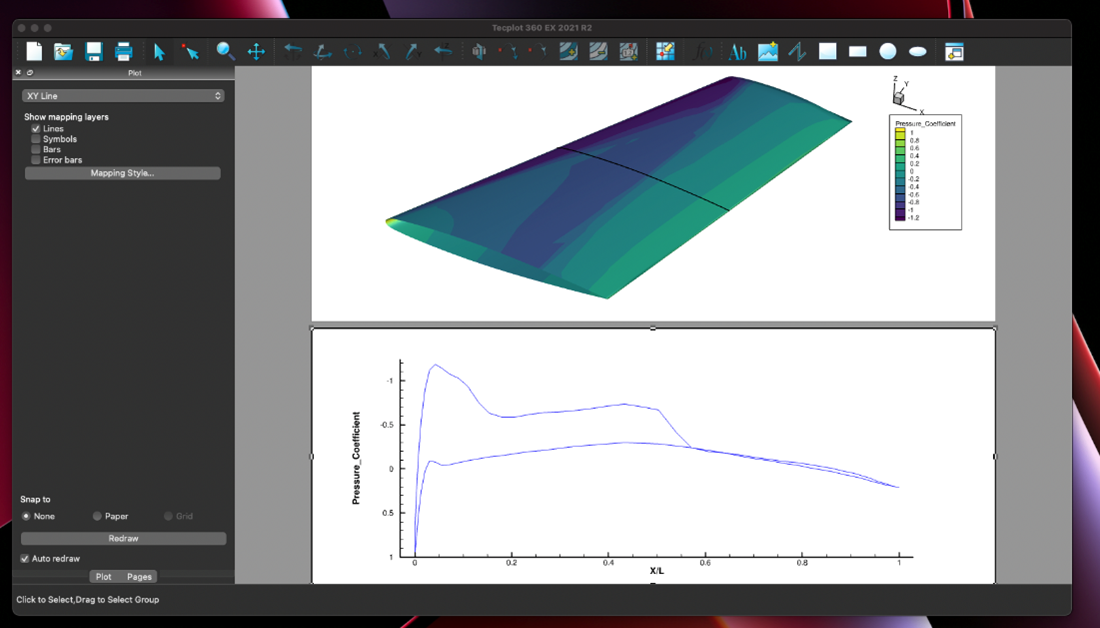
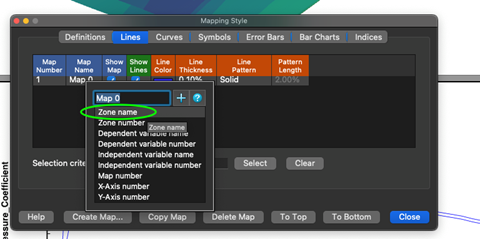
And now we have our XY line plot showing the extracted slice from the wing surface. I can change the line color to (blue) and turn-on the line legend. To change the map name to the zone name, in the Mapping Style dialog we can right-click on the mapping and choose zone name by double-clicking on it:
This concludes the tutorial on surface slice extraction. Thank you for watching.
For more advanced information on how to perform other data extractions, check out our other videos linked below.
- Video: Automating slice extraction and plotting examples
- Video: Comparing CFD with Experimental Data Through Extractions (go to timestamp ~21:00 – ~23:00)
- Documentation: Getting Started Guide
- Blog Tutorial: How to Extract Data from a Surface, through Time