


 MENU
MENUDescription
This video demonstrates how to show XYZ slices at the same time in Tecplot 360.
Step 5. Access the contour context menu by right-clicking on the slice.
- Run Tecplot 360.
You can follow along by getting a free trial of Tecplot 360 » - Open the sample PLT file, ductflow.plt, (located in this folder after installation: examples3D_Volume).
- If the Plot sidebar is not showing, click View > Plot Sidebar.
- Click the interactive slicing tool icon,
 and then click inside of the geometry. You’ll see how the X-plane is turned on by default. Click again to see how you may change the slice location.
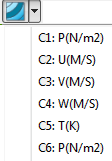
 - You may easily change the to variable to show in the slice contour. Use the context menu (right mouse click on the slice). Click the Contour down arrow and find your contour variable, say pressure or temperature.
- Open the Slice Details Dialog. The X-slice is on and the Slice location is set to X-Planes, by default.
- To place the X-slice location, click Show primary slice (on by default), and use the slider to move the slice to the desired location. You may also use the up or down arrows, or enter a raw X value in the edit box.
- In order to show the other slices in Y and Z, we need to show an additional slice group for each. Click the Definition tab (if it is not already showing).
- To view the Y-slice, click the 2 button and check Show group 2. The Slice location is set to Y-Planes by default. Use the context menu (as in Step 5 above) to change the Y-slice contour variable to be the same variable used for the X-slice.
- Place the Y-slice as you did before for the X-slice.
- To view the Z-slice, click the 3 button and check Show group 3. The Slice location is set to Z-Planes by default. Use the context menu (as in Step 5 above) to change the Z-slice contour variable to be the same variable used for the X-slice and Y-slice.
- Place the Z-slice as before.
- Close the Slice dialog box.
- When the slice tool is selected you may click 1, 2 or 3 on your keyboard to switch between groups.
- Activating lighting effects for the XYZ slices will make the intersections of the slices more apparent. Click slice details to see all options, such as the Contour tab Gouraud lighting effect.
Thanks for watching!